The Flash Electric

admin, Author at The Flash Electric

Why Your Panel Smells Warm: 8 Early Failure Indicators

i 9

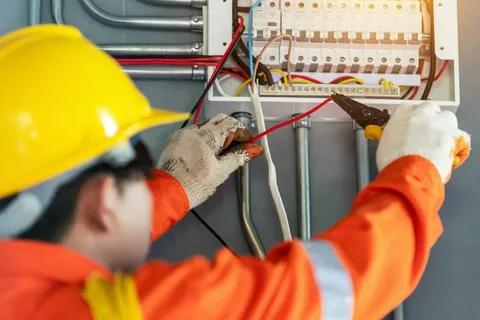
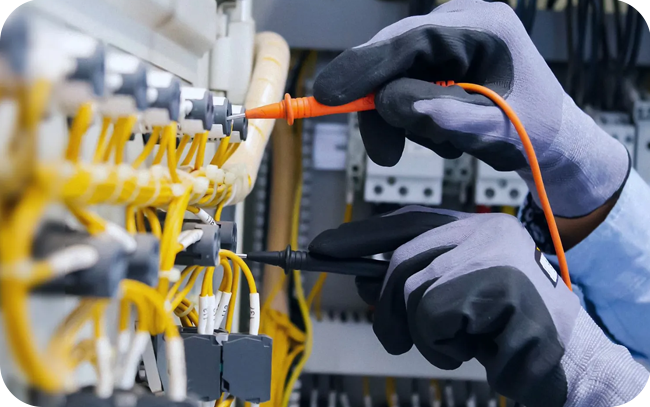
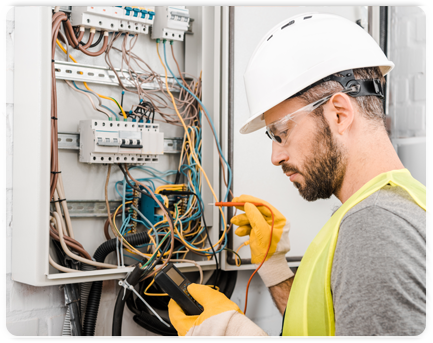
Why Your Panel Smells Warm: 8 Early Failure Indicators Have you ever walked by your electrical panel and stopped because you caught a strange, warm smell? Maybe you’ve asked yourself, “why does my electrical panel smell like that?” That’s your gut telling you to pay attention. That faint odor is one of the clearest warning smells your home can give you. It’s easy to brush it off, thinking it’s just dust on a lightbulb or the furnace kicking on. But here’s the thing: your main electrical panel shouldn’t have a smell at all. That warmth and odor are signs of stress inside, like a quiet alarm bell. Ignoring it doesn’t make the problem go away; it usually lets it build into something more serious, like damaged electrical panel wiring or a fire risk. So, what smells are warning signs, and what should you do? You’re in exactly the right place. In this guide, we’ll walk through the 8 early signs that often start with that warm smell, explain what’s happening in simple terms, and give you the steps to protect your home and family. Let’s figure this out together. What That Warm Smell Really Means You’re not imagining things, and you’re not overreacting. When you ask, “what does it mean when you smell electrical burning?” the short answer is that something is getting too hot. Think of it like a cord that gets warm when you plug in too many things. Inside your electrical panel board, that same thing happens with loose screws, worn-out parts, or wires pushed beyond their limit. This heat is the real problem here. It slowly cooks the plastic insulation around wires (which causes that slight burning smell from electrical panel) and can eventually lead to a much more dangerous situation. That smell of electrical fire is what happens when materials are already burning. Your goal is to catch the problem in the “warm smell” phase, long before it gets any worse. The danger of ignoring it? It’s not just a burnt-out breaker. We’re talking about damage to your appliances, a real risk to your home’s structure, and the safety of everyone inside. It’s the most important reason to not just notice these warning smells, but to act on them quickly. Speaking of action, the first step is knowing exactly what to look and listen for beyond just the smell which is exactly what we’ll cover next with the 8 key signs. The 8 Early Failure Indicators You Need to Know Now that you understand why that smell is a big deal, let’s play detective. These are the signs that often show up alongside (or even before) that warm odor. Think of this as your checklist. If you notice one, it’s a hint. If you notice two or more, it’s a clear message from your home that your electric panels need a professional check-up. 1. A Burning Smell This is the one that likely brought you here. A persistent burning smell from electrical panel is a direct red flag. It could smell like hot plastic, melting rubber, or even an oddly sharp, chemical scent. If you ever think, “I smell electrical burning,” don’t talk yourself out of it. This isn’t normal and needs immediate attention. 2. A Fishy Scent Here’s a weird one that throws people off. If your electrical panel smells like fish and there’s no forgotten dinner nearby, it’s often a very specific warning. This can be the smell of overheated electrical components, like a failing breaker or melting plastic insulation. It’s a classic example of how warning smells aren’t always what you’d expect. 3. Buzzing or Humming Your panel should be quiet. A steady buzz or hum is the sound of electricity jumping across a gap (called arcing) or vibrating through a loose connection. It’s that same faulty connection creating the heat we talked about, now showing itself so you can hear it. 4. A Warm or Hot Panel Go ahead and carefully place your hand on the metal door of your panel. It should feel room temperature. If it’s unusually warm or even hot to the touch, that’s heat escaping from a serious internal problem. This is the physical proof of why your panel smells warm. 5. Frequent Circuit Breaker Trips If your breakers are tripping more often than you flip a light switch, it’s a sign they’re working overtime. They’re designed to shut off power when a circuit is overloaded or has a fault, like the loose, overheating connections we’ve been talking about. If they trip for “no reason,” it’s often because the problem is hidden inside the electrical panel board itself. 6. Flickering or Dimming Lights Do your lights dim when the fridge kicks on, or flicker for no apparent reason? This isn’t a ghost; it’s a voltage drop. It can happen when a struggling connection in the panel can’t deliver steady power. It’s a visible side effect of the same instability that causes buzzing and heat. 7. Discolored or Scorched Outlets/Switches Take a quick look at the outlets and switches around your house, especially near the panel. Any brownish or black scorch marks, or yellowing plastic? That’s heat damage. The heat travels from a bad connection in the panel out through the wires to the outlets, leaving a visible trail. 8. Old Age or Known Problem Brands Sometimes, the biggest clue isn’t a smell or sound, but a date. If your home is over 25 years old and the panel has never been updated, the electrical panel parts are simply past their prime. The same goes for certain brands that were known for faulty breakers that don’t trip when they should. Age and reputation themselves are silent failure indicators. So, you’ve got the checklist. You might be spotting a few of these signs right now. But what’s actually causing all this heat and commotion behind the panel door? Let’s pull back the cover and look at the common culprits. Causes Behind a Warm Electrical Panel All those signs … Read more

Why Outlets Keep Buzzing During Storms: Surge Fix Guide 2026

What to expect from our process 2

Why Outlets Keep Buzzing During Storms: Surge Fix Guide 2026 You’re cozied up at home as a thunderstorm rolls through. The rain is loud, the lightning flashes, and then you hear it—a low, persistent buzzing coming from the wall. That outlet making noise isn’t just spooky; it’s a clear signal from your home’s electrical system. If you’ve ever thought, “why is my outlet buzzing when plugged in during bad weather?” you’re right to be concerned. This isn’t a sound to ignore. A buzzing electrical outlet during a storm often points to dangerous power surges or internal faults that can damage your electronics or, in severe cases, create a real fire risk. Your outlet is literally crying out for help. This guide will walk you through exactly why this happens, how to assess the danger, and the smart steps to take to protect your home. Let’s silence that buzz for good. Why Outlets Buzz During Storms Think of your home’s wiring like a network of calm rivers, carrying a steady flow of electricity to your devices. Now, imagine a storm sends a massive tidal wave crashing into that system. That tidal wave is a power surge, and it’s the main reason you hear that alarming wall outlet making buzzing noise during bad weather. This sudden, violent spike in voltage overwhelms the delicate connections inside your outlet buzzing. The components literally vibrate under the stress, creating that audible hum or buzz. It’s a sign that electricity is being forced through in a way it wasn’t designed to handle. While a very faint hum from a large appliance might be normal, the buzzing you hear during a storm is different. It’s louder, more persistent, and a direct cry for help from your electrical system. So, if you’re asking your smart speaker, “Is a buzzing outlet an emergency?” during a thunderstorm, the short answer is: treat it like one. It means your home’s first line of defense is under attack, and you need to know why. Common Causes of a Buzzing Outlet During Storms Now that you know a storm surge is like an electrical tidal wave, let’s look at where the damage happens. That buzzing outlet is the symptom, but we need to find the exact cause inside your walls to fix it correctly. Power Surges and Lightning Strikes A direct or nearby lightning strike is the ultimate surge. It can send hundreds of thousands of volts into your utility lines and home wiring in a microsecond. This doesn’t just cause a buzzing electrical outlet; it can vaporize wires and electronics instantly. More commonly, surges from the utility grid during a storm send smaller, repeated spikes that wear down outlet connections over time, making them arc and buzz. Loose or Damaged Wiring Storms can vibrate your home. If the wires behind your outlet were already barely holding on, that vibration can shake them just enough to create a dangerous, loose connection. Electricity now has to jump across a tiny gap, creating a mini spark (an arc) with each jump. This constant arcing is what causes the buzzing sound and intense heat. This directly leads people to search, “Can a buzzing outlet cause a fire?” and the answer is yes, because those sparks are incredibly hot. Overloaded Circuits Picture this: during a storm, your family is all home. The fridge, TV, computers, and lights are all on. Maybe you’re even running a space heater. This piles a huge electrical load on your circuits. If an outlet is on a circuit that’s maxed out, the wires can overheat and vibrate, causing a buzz. You might notice this even with an outlet buzzing nothing plugged in on that same overwhelmed circuit, which is a major warning sign. Faulty GFCI or Surge-Protected Outlets GFCI outlet buzzing is a specific concern, especially in bathrooms, kitchens, or garages after a storm. These outlets have internal circuitry that can fail or become overly sensitive after absorbing surge damage. They might buzz because their internal breaker is trying and failing to trip properly. Similarly, a cheap power strip might buzz because its basic surge component is overwhelmed and damaged. Electrical Interference from Appliances or Lightning-Induced Feedback Large motors in your fridge or HVAC system can create electromagnetic “noise” that sometimes transfers through wiring, sounding like a buzz. During a storm, a nearby lightning strike can induce a current in your home’s wiring without even hitting it directly—a phenomenon that can make several outlets hum ominously at once. Understanding these causes helps you see why that noise is more than just an annoyance; it’s a clue. And that clue tells you whether you’re dealing with a simple fix or a situation that needs professional help. Is a Buzzing Outlet Dangerous? Let’s cut to the chase. Hearing that buzz and wondering, “Is a buzzing plug socket dangerous?” is your gut feeling trying to keep you safe. That sound is almost never “fine.” Think of it like a smoke alarm chirping; it’s a designed warning. The buzz itself is a symptom of electricity misbehaving—often through arcing or intense resistance. This creates heat. A lot of heat. In fact, it’s this heat that directly answers the vital question: “Can a buzzing outlet cause a fire?” Absolutely. The heat from a loose wire or constant arcing can ignite surrounding insulation, wood, or dust inside your wall, starting a fire you might not see until it’s too late. Beyond fire, a buzzing electrical outlet poses a serious shock risk, especially if the outlet is damaged or if there’s moisture from storm humidity. And let’s not forget your gadgets. That chaotic electrical flow is a death sentence for sensitive electronics like your TV, computer, or refrigerator’s control board. So, is it an emergency? If the buzzing is loud, accompanied by a burning smell, sparks, or heat you can feel, treat it like one. Your immediate action plan, which we’ll cover next, starts with safety. How to Safely Diagnose a Buzzing Outlet Okay, you’ve heard the buzz and … Read more

Top 7 Surge Protection Tips for High-Power Appliance Homes

What to expect from our process 2

Top 7 Surge Protection Tips for High-Power Appliance Homes Ever had your lights flicker when the air conditioner kicks on, or wondered what that weird buzzing from your fridge really means? That’s your home trying to tell you something. If your house is full of big appliances, you’re facing a hidden risk every day: power surges. These electrical spikes can fry your electronics and burn out motors in a flash, turning your appliances into very expensive paperweights. For homes with HVAC systems, oversized refrigerators, or multiple high-power gadgets, this isn’t just a “maybe.” It’s a “when.” Every time these power-hungry machines start up, they can create small surges right inside your walls, quietly wearing down your stuff. So, if you’ve ever asked, “Is surge protection needed for my air conditioner?” or worried about your computer during a storm, you’re asking the right questions. Protecting your home doesn’t have to be confusing or expensive. By understanding a few key power surge protection tips, you can build a simple defense that works. This guide will walk you through seven simple steps, from the single best device you can buy to easy habits that make a huge difference, so you can stop worrying and start protecting. What Causes Power Surges? Okay, so we know surges are bad news. But where do they even come from? You might picture a lightning bolt striking a power line, and you’re right—that’s a big one. But the truth is, most power surges aren’t that dramatic. They’re hiding in plain sight, often starting right inside your house. Think of it this way: your home’s wiring is like a network of pipes for electricity, meant to handle a steady flow. A power surge is a sudden, massive wave crashing through those pipes. The classic outside causes are lightning strikes (even ones a mile away) and when the power company does work on the grid.  But here’s the kicker for a high-power home: your own appliances are usually the culprits. That jolt you feel when your air conditioner or washing machine clicks on? That’s a small internal surge. Old or faulty wiring makes this problem even worse, creating little electrical traffic jams that spike the voltage. Top 7 Surge Protection Tips Let’s get into the good stuff—the simple steps you can actually take. Think of this not as one magic fix, but as building layers of defense for your home, like locking your doors and then also setting an alarm. Tip 1: Install a Whole-House Surge Protector Picture this: a huge surge from a downed power line is racing toward your house. A plug-in strip is like asking a napkin to stop a fire hose. What you need is a bouncer at the front door. That’s what a whole house surge protector is. An electrician installs this single device right at your main electrical panel (that metal box you probably ignore). Its one job is to stop massive outside surges before they get into your home’s wiring. It’s the single most important thing you can do, especially if you’ve ever thought, “how much surge protection do I need for everything?” This won’t protect against the smaller surges appliances make inside your house. That’s why we need more layers. But starting here? It’s a game-changer. Tip 2: Add Point-of-Use Surge Protectors for Sensitive Electronics We’ve all got that tangled nest of cords behind the TV or computer. Plugging a $1,500 flat-screen into a $10 power strip is like storing a diamond ring in a cardboard box. You need a proper surge protective device. Here’s what to look for: First, make sure it’s not just a “power strip.” The box must say “surge protector.” Second, check the joule rating—that’s its strength. For your entertainment center or gaming PC, look for one rated at 2000 joules or higher. This is the best way to protect PC from a power surge or save your smart TV. Pro Tip: These protectors wear out. If yours has taken a big hit (like from a close lightning strike) or the little “protected” light goes out, it’s time for a new one. Tip 3: Use an Uninterruptible Power Supply for Critical Electronics You’re in the middle of an important project or an epic gaming session when—blink—the power goes out for just a second. Everything’s gone. The misery! An uninterruptible power supply (or UPS) is the hero you deserve. It looks like a bulky battery backup you plug your computer and modem into. During a tiny outage or a bad voltage flicker, it instantly switches to battery power, giving you time to save everything and shut down properly. No more lost work, no fried hard drives. It’s pure peace of mind in a plastic box.  Tip 4: Ensure Proper Grounding and Wiring Health You can have the best surge protectors in the world, but if your home’s electrical “bones” are bad, you’re in trouble. We’re talking about old, cracked wiring or outlets that aren’t properly grounded (that third, round hole in your outlets). How do you know? If your outlets are the two-pronged kind, if you get a tiny shock touching an appliance, or if lights dim regularly when you turn something on, your wiring is waving a red flag. This is one of the biggest signs of power surge in home vulnerability. Bad wiring doesn’t just risk surges; it risks fires. Getting a quick check from a licensed electrician is like a physical for your house—it tells you what you’re really working with. Tip 5: Install Dedicated Circuits for High-Power Appliances Imagine if your fridge, microwave, and hair dryer all tried to drink from the same straw at the same time. Chaos, right? That’s what happens in your walls when high-power appliances share a circuit. The fix? Dedicated circuits. This means your big-ticket items like your air conditioner and refrigerator get their own private electrical line straight from the panel. No more fighting for power with the toaster. It prevents those internal surges we talked about and … Read more

5 Silent Signs Your Electrical Panel Is Overheating at Night

5 Silent Signs Your Electrical Panel Is Overheating at Night It’s the middle of the night, your home is quiet, but something isn’t right. You might miss the subtle clues that your main electrical panel is silently struggling. Unlike a blown fuse or a tripped breaker, electrical panel overheating is a hidden danger that often escalates when you’re least aware. If you’ve ever asked, “why does my breaker box feel warm?” or “what are the quiet signs of an electrical problem?”, you’re thinking like a smart homeowner. These silent warnings matter most at night, when delayed reaction can turn a minor issue into a major hazard. This guide will walk you through the five subtle, after-dark signs that your home’s heart is running a fever, so you can act before trouble wakes you up. Why Electrical Panels Overheat at Night (Quick Explanation) You might think your home uses less power at night, and you’re often right. But that’s exactly when electric panel overheating can become a sneaky problem. Think of your panel like the engine of your car after a long drive; it’s had all day to build up heat from constant use. At night, even with fewer lights on, big appliances like your air conditioner cycling, water heater kicking in, or an electric vehicle charging can place a sustained, heavy load on circuits that are already warm from daytime use. The main culprits? Often, it’s a combination of older electric panels for houses that weren’t designed for today’s gadgets, or simple wear and tear like loose connections inside the box in electrical panel. These issues create resistance, and resistance creates heat. At night, with the house quieter and cooler, that built-up warmth in the electrical panel board becomes more noticeable—and more dangerous—if it’s a sign of a chronic problem. The 5 Silent Signs Sign #1 – Late-Night Breaker Trips This is one of the most confusing signs. You’re not running the vacuum or the microwave. Yet, in the evening stillness, you hear a definitive CLICK from the hallway-a circuit breaker has tripped for “no reason.” This is what we call a ghost trip, and it’s a classic whisper of electrical panel overheating and overloading. Here’s why it happens at night: The electrical panel and breakers have thermal components. If the panel has been running hot all day due to a loose wire or an overloaded circuit, the breaker itself can become thermally sensitive. As it cools slightly in the nighttime air, that temperature change can be enough to cause it to snap off, even if the immediate electrical load seems normal. It’s the breaker’s final plea for help before a more serious fault occurs. If you’re constantly resetting the same breaker after sunset, it’s not a ghost—it’s a red flag. Sign #2 – Warm Electrical Panel or Hot Spots Here’s a simple, safe test anyone can do. Next time you’re heading to bed, gently place the back of your hand on the metal door of your breaker box in the electrical panel. It should feel room temperature, the same as the wall around it. If it feels distinctly or consistently warm to the touch, you’ve found a silent sign. This warmth is wasted energy—electricity meeting resistance and escaping as heat. Inside that metal box, connections at the electrical panel components or the main bus bars may be loose. A loose connection is like a narrow, kinked hose; it creates friction (resistance) as electricity tries to force its way through, generating heat. This isn’t a problem that will fix itself. That warmth is a direct symptom of inefficiency and a precursor to failure. It answers the question, “can my electric panel get hot without tripping?” with a definite, and concerning, yes. Sign #3 – Burning Smell or Subtle Odor Your nose is a powerful diagnostic tool. A faint, acrid smell reminiscent of hot plastic or burning dust near your electric board panel is a serious warning you should never ignore. This odor often means you have overheated the electrical panel. The insulation around wires or the plastic housing of components is slowly baking, releasing that distinctive scent. At night, with air circulation from HVAC systems often lower, this smell can pool and become more noticeable in a quiet hallway or basement. It’s the smell of degradation. Once wire insulation breaks down, the risk of a short circuit or arc flash increases dramatically. If you catch this scent, especially if it’s paired with a warm panel, it’s not a time for wonder—it’s a time for action. This sign directly addresses the worry, “what does an electrical fire smell like when it first starts?” Sign #4 – Flickering Lights (Only In Certain Rooms) You’re reading in the living room, and the lamp dims for a second. At the same time, the hallway light you can see down the hall also pulses. This synchronized dimming is a big clue. It’s not a problem with one light bulb; it’s a problem at the source—your electric control panel. When a major connection inside the panel is loose or corroded, it struggles to deliver consistent voltage, especially when a large appliance like the refrigerator compressor turns on. This causes a brief, system-wide voltage drop, seen as lights dimming in multiple rooms. It’s a sign the panel is failing to regulate power smoothly. Think of it as a stutter in your home’s heartbeat. If lights are flickering at night when other big loads activate, your electrical panel board is telling you it’s losing its grip. Sign #5 – Buzzing, Humming or Clicking Sounds Silence is golden, especially for your breaker box. A healthy electrical panel board should be almost silent. So, if you lean in near it at night and hear a persistent low hum, a buzzing, or—most alarming—a faint sizzling or crackling sound, listen closely. You are hearing electricity escaping. This sound is often arcing: electricity jumping across a tiny gap in a loose connection. Every tiny arc generates intense heat, further damaging the connection … Read more

12 Receptacle Repair Checks for Dead Outlet Circuits

12 Receptacle Repair Checks for Dead Outlet Circuits Ever plug in your phone, only to find the outlet as dead as a doornail? That feeling is all too common, but before you panic or call for help, take a breath. Most dead outlets have a simple fix you can handle yourself. This guide is your first step in effective dead outlet troubleshooting. You might be asking, “What are the steps to fix this safely?” or “How can I tell if it’s a quick fix or a serious problem?” Great questions. We’ll walk you through the answers, step-by-step. We’ve built a clear checklist of 12 receptacle repair checks, designed to take you from the simplest solution to identifying when you truly need a pro. Let’s restore your power and your peace of mind. Understanding Your Home Electrical System Before we dive into the details, let’s take a moment to understand what exactly we are dealing with.  Think of your home’s electricity like the water in your house. The breaker panel is the main shutoff valve. From there, pipes (the circuits) carry water to different rooms. Your outlets are like individual faucets. If one faucet is dry, the problem could be with that specific tap, a closed valve somewhere in the line, or a bigger issue back at the main. This is crucial for circuit troubleshooting. A single non working outlet might be a local problem. But if several taps are dry, you’re likely dealing with a circuit issue. Also, remember those special faucets in your bathroom and kitchen? Those are your GFCI outlets. They have a built-in safety shutoff that trips easily to prevent shocks, which is a key reason why outlets stop working in damp areas. Understanding this helps you know where to start looking, which is exactly what we’ll do next. 12 Receptacle Repair Checks Now, let’s move from theory to action. Follow these checks in order. We start with the simplest, safest possibilities before moving deeper. Remember our water analogy? We’re checking the easiest “fixes” at the faucet first. Check 1: Test the Appliance or Device This is the “is it plugged in?” of the electrical world. Before you blame the outlet, make sure your lamp, charger, or appliance isn’t the culprit. Unplug it and plug it into a known working outlet across the room. If it works there, your device is fine, and we’ve confirmed you have a true non working outlet to diagnose. If it doesn’t work, you’ve just solved the mystery—it’s the device, not your wiring. Check 2: Inspect Wall Switches Here’s a classic head-scratcher. In many homes, especially in living rooms and bedrooms, an outlet is controlled by a wall switch. You might have flipped that switch off last night and forgotten. So, what’s the simple fix? With your device plugged into the dead outlet, walk around the room and flip every single wall switch on and off, one at a time. Listen for a click or watch your lamp. If a switch brings it to life, you’ve found your answer. This is a perfect example of a quick step by step dead outlet repair that takes seconds. Check 3: Reset All Circuit Breakers If your outlet is in a bathroom, kitchen, garage, patio, or basement, it’s almost certainly protected by a GFCI. But here’s the key thing many miss: one GFCI outlet can protect other normal outlets downstream. So the tripped GFCI controlling your dead outlet might be in a different room entirely. Your mission is to walk through your home and find every GFCI outlet (look for the TEST and RESET buttons). Press every RESET button you find. You might hear a firm click. Once you’ve reset them all, go back and test your original outlet. This single check solves a huge percentage of GFCI outlet not working mysteries. This is frequently the solution when you have a GFCI outlet not working but the breaker is not tripped. Check 4: Inspect Fuses (If Applicable) If your home has a fuse box instead of a breaker panel, this check is for you. A blown fuse is a common reason why outlets stop working. Turn off the main power switch first. Then, visually inspect each round, screw-in fuse. Look for a cloudy glass window or a broken metal filament inside. To fix this, you must replace the blown fuse with a new one of the exact same amperage (like 15-amp or 20-amp). Using a higher-amp fuse is a serious fire hazard, as it allows more current than your wiring can safely handle.  Check 5: Reset GFCI Outlets Head to your breaker panel. Now, looking for a tripped breaker can be tricky. A tripped breaker often sits in a middle position, not fully ON, not fully OFF. Gently press on each breaker switch. If one feels loose or “spongy” compared to the others, that’s likely your culprit. The definitive step by step dead outlet repair action here is to firmly flip that breaker to the OFF position first, and then back to ON. You should feel a solid click. If it immediately trips again, stop. That signals a persistent overload or short, and it’s time to call a professional electrician. This is a core part of circuit troubleshooting.  Check 6: Inspect for Blocked GFCI Outlets Let’s circle back to those GFCI outlets. Sometimes, the problem isn’t electrical but mechanical. If your GFCI outlet has no reset button that pushes in, or the button feels stuck, it might be blocked. Over time, paint, dust, or even a small piece of debris can jam the mechanism. Carefully inspect the outlet. If the reset button is blocked, you’ll need to gently clean the area or, more likely, replace the GFCI outlet blocked, which leads us into the next phase of receptacle repair.  Check 7: Test Other Outlets on the Same Circuit Before we open anything up, let’s map the problem. Is it just one dead outlet, or is a whole section of the room dark? Plug a … Read more

Electrical Home Inspections for Older Homes: 7 Issues Found in 2026 Inspections

i 9

Electrical Home Inspections for Older Homes: 7 Issues Found in 2026 Inspections Older homes need careful electrical checks because wiring, outlets, and panels weaken over time. These issues grow slowly and stay hidden until they interrupt daily use. Therefore, clear inspections help you see early risks and plan simple upgrades before they spread. This guide explains seven issues found often in 2026 reports and shows how each one affects safety. Beginners often ask where to start with lighting upgrades. For this reason, Ceiling Light Installation Guide for Home Renovations 2026 supports the same approach and gives you steady steps. Use that guide with your electrical home inspection so you understand each part of the process. In brief, both resources help you prepare before repairs begin. What Is a Full Electrical Replacement? If you’ve ever wondered whether a full electrical replacement is the same thing as rewiring, you’re not alone. Most homeowners think upgrading a few wires or outlets will fix their issues, but this process has far more tucked into it than that. A complete electrical replacement involves upgrading your home’s breaker panel, wiring, outlets, switches, grounding system, and sometimes even the service line that connects your property to the utility grid. Unlike simple house rewiring, this process makes sure every part of your electrical system works together seamlessly. It’s not just about replacing what’s old; it’s about future-proofing your home. So if you’ve ever asked yourself “how do you know if you need a new electrical panel?” or “when should I replace my wiring?”, you’re in the right place. The next section will walk you through seven clear signs it’s time to upgrade before your system fails when you need it most. Old or Damaged Wiring Even the best electrical systems wear out with time. But here’s the tricky part — the warning signs of electrical problems in home rarely show up as something dramatic. Instead, they start small, like a tripped breaker here, a dim light there, a strange buzzing sound you can’t quite place. So, let’s break down the signs your home may need an electrical replacement, what causes each one, and which components a licensed electrician would typically replace to bring everything back up to code and efficiency. 1. Frequent Breaker Trips and Power Surges Hidden Weak Points: Old wiring weakens as insulation breaks down and metal parts lose strength. Many older homes hide this damage inside walls, where heat and age create small cracks. Inspectors often spot these weak points during an electrical home inspection because they check each main line for safety. Signs You Notice: Flickering bulbs, warm outlets, and frequent breaker trips signal early wiring trouble. These signs appear during an electrical home safety inspection, where the system gets tested under normal load. Loose connections and worn spots often show up during this process. Safety Check Steps: Professionals follow a home electrical inspection checklist to review outlets, switches, panels, and exposed wires. Each part gets checked for stability, grounding, and heat issues. This reveals whether the wiring needs small repairs or full replacement. Overloaded Electrical Panels Panel Stress: Older panels struggle when more devices run than they were built to support. Heat builds in the breakers, and small faults begin to form. Consequently, these issues appear early during a home inspection electrical, especially when the system feels unstable. Visible Warning Signs: Breakers that trip often, warm metal surfaces, and buzzing sounds point to overload. These symptoms grow slowly, yet they create real pressure on older systems. In addition, inspectors spot these patterns during a whole home electrical inspection, where load balance becomes clear. Inspection Review Steps: Electricians check breaker strength, grounding, and wiring entry points through an electrical home inspection checklist. This process reveals weak breakers or outdated parts that need attention. Therefore, upgrading the panel at the right time prevents heat buildup and reduces long-term risk. Outdated Breaker Panels Old Panel Limits: Many older homes still use panels that no longer match modern power needs. These units handle less load and react slowly during faults. Moreover, issues build quietly until they disrupt daily use, which inspectors uncover during an electrical home inspection. Performance Problems: Slow breaker response, flickering lights, and uneven power flow show that the panel has reached its limit. These signs appear often in homes with growing electrical demands. In addition, a home electrical safety inspection reveals weak spots that need quick attention. Cost Considerations: Upgrading an old panel depends on the home’s size and wiring condition. Prices vary by region, yet most reports show stable trends. Consequently, homeowners check the home electrical inspection cost before planning the replacement. Loose or Unsafe Outlets Aging Outlet Damage: Older outlets loosen with use as metal parts wear down and grip weakens. This creates small gaps where heat builds and sparks form. Consequently, inspectors often flag these spots during an electrical home safety inspection because loose outlets increase daily risk. Everyday Warning Signs: Outlets that wobble, discolor, or heat up during use show clear problems. These signs appear slowly yet signal deeper wear inside the wall. Moreover, an electrical home inspection checklist helps identify which outlets need tightening, repair, or full replacement. Repair Planning: Fixing unsafe outlets depends on the wiring behind them. Some need a simple tightening, while others need new boxes or updated wiring. Therefore, homeowners review the cost of electrical inspection on home early so they understand repair needs before moving forward. Improper Grounding Ground Path Weakness: Older homes often have grounding paths that no longer meet current standards. Weak grounding fails to redirect stray electricity during faults. Consequently, inspectors report this often during a whole home electrical inspection because it affects overall system safety. Visible Clues: Shocks from switches, light buzzing, and metal parts that feel charged point to grounding issues. These problems look small yet signal deeper trouble in older wiring paths. Moreover, a home inspection electrical review highlights spots where grounding needs improvement. Correction Steps: Fixing grounding requires checking each outlet, the main panel, and the … Read more

Protect Your Home from Power Surges in 2025: What You Need to Know

i 9

Protect Your Home from Power Surges in 2025: What You Need to Know ZAP! BOOM! CRACK! No, that’s not the sound of your neighbor’s latest action movie marathon. That’s the sound of a power surge turning your prized 75-inch TV and your “productivity-only” gaming rig into very expensive, very silent paperweights. Think your fancy power strip is enough to stop that? Think again. In 2025, our homes are basically electronic petting zoos, packed with smart gadgets, EV chargers, and appliances that are more sensitive than a critic at a poetry slam. They need a hero. They need whole house surge protection. If you’ve ever wondered, “what does a whole house surge protector do that my cheap power strip can’t?”, you’re about to find out. We’re going to break down how this unsung hero defends your home from electrical hazards, both big and small. What Exactly Is a Power Surge? Alright, let’s get down to brass tacks. Imagine the electricity in your wires is like water in a pipe. Normally, it flows at a nice, steady pressure, that’s your standard 120 volts. Now, imagine someone suddenly attached a firehose to that pipe and blasted it. That is a power surge. This electrical tidal wave can be caused by external reasons like a lightning strike (the most common reason), or by something as simple as your own air conditioner kicking on. Yes, your house can literally attack itself from the inside. This is why basic power surge protection is no longer a luxury; it’s a necessity. So when people ask, “what’s the difference between a simple voltage spike and a full-blown power surge?”, think of it like this: a spike is a shout, but a surge is a scream that blows out the microphone. Both are bad for your electronics’ delicate ears.  What Is a Whole House Surge Protector and How Does It Work? Remember that electrical firehose we talked about? A whole house surge protector is the master valve installed at your main electrical panel that slams shut before that tidal wave ever gets inside your home’s plumbing. It’s your first, and most important, line of home surge protection. So, how does a whole house surge protector work? Without getting too deep in the technical weeds, it’s a brilliant bouncer for your electrical system. It constantly monitors voltage. The second it detects a dangerous spike, it instantly diverts the excess energy to the ground wire, safely away from your precious gadgets. It’s the reason a lightning bolt down the street doesn’t become a funeral pyre for your smart home. While that power strip at your TV is a good last-ditch bodyguard, it’s already inside the building. A whole house surge protector stops the trouble at the door. Do You Really Need a Whole House Surge Protector in 2025? Let’s be real. You wouldn’t build a castle without a moat and a strong gate, right? So why would you run a modern, gadget-filled home without a fortress-grade electrical surge protection system? If you’re still on the fence, ask yourself this: “do i need a whole house surge protector if I already use power strips?” The answer is a resounding YES. Think of it as layers of defense. The whole-house unit is your castle wall. The power strips are the shields for your individual knights (your TV, computer, etc.). If the wall fails, the shields are your last hope. But why let the enemy breach the walls in the first place? Given the rising number of grid fluctuations and our addiction to expensive electronics, the real question isn’t “Do I need one?” but “Can I afford not to have one?”  Types of Surge Protectors: Type 1 vs Type 2 Alright, so you’re sold on getting a bodyguard for your house. But did you know they come in different specialties? Think of it like this: you need someone to stop trouble at the property line and inside the mansion. First up, meet the Type 1 surge protector. This is your perimeter security. It’s installed on the outside of your home, at the meter, before electricity even enters your main panel. Its specialty? Taking the full force of an external attack, like a direct or nearby lightning strike or a massive spike from the utility grid. It’s the first and bravest line of defense. Then you have the Type 2 surge protector. This is the one we most commonly talk about for installing whole house surge protector systems. It lives inside your main electrical panel and is the workhorse that handles the daily drama, including the surges generated inside your home by air conditioners, dryers, and other power-hungry appliances turning on and off. “So, what about a whole house emp surge protector?” That’s a specialized, top-tier version of a Type 1 or 2 device, built to handle the extreme, fast-rising spike of an electromagnetic pulse. Benefits of Installing a Whole House Surge Protector So, what’s in it for you? Let’s break down the benefits. Protection for all appliances: From your humble toaster to your sophisticated car charger, every single plug-in device gets a bodyguard. No more playing favorites. Increased lifespan of electrical devices: Those tiny, internal surges we talked about? They slowly cook your electronics from the inside out. This stops that, extending the lifespan of everything you own. Defense against lightning: While we can’t promise it’ll handle a direct strike from Thor’s hammer, a whole house surge protector is your best bet against the surges from a nearby lightning hit. Lower risk of electrical fires: By stopping electrical overloads in their tracks, you’re cutting the risk of an electrical fire starting in your walls. Financial protection for expensive electronics: This is the ultimate “don’t replace it, protect it” strategy for your expensive TVs, computers, and smart kitchen. Boosts home value and insurance confidence: It’s a modern upgrade that tells any future buyer (and your insurance company) that you take protecting the house seriously.  Cost of Whole Home Surge Protection in 2025 Let’s talk … Read more

5 Reasons Your Home Needs an Electrical Panel Upgrade Before Winter

1st Image 4

5 Reasons Your Home Needs an Electrical Panel Upgrade Before Winter It’s a cold winter evening, and you’ve just plugged in a space heater to warm up the living room. Suddenly, the lights in the kitchen flicker. Sound familiar? Many of us don’t think about our home’s electrical system until it starts sending us little signals like this. But winter is the ultimate test, with heaters, holiday lights, and more time spent indoors all demanding a lot more from your power supply. So, if you’ve found yourself asking, “Should I upgrade my electrical panel?” you’re asking the right question at the right time. Getting a house electrical panel upgrade before winter isn’t just a home improvement project; it’s about peace of mind. Let’s explore the five clear signs that answering “yes” to that upgrade is the key to a safer, cozier winter. What an Electrical Panel Does Think of your electrical panel as the hardworking command center of your entire house. It’s that metal box you probably see in the basement or garage, but it’s responsibly distributing power to every light, outlet, and appliance. Its most important job? Keeping you safe. When a circuit gets overloaded, like when your heater and microwave are on at the same time, the breakers inside trip on purpose. It’s basically the system’s way of saying, “Whoa, that’s too much!” But just like any other part of your home, this command center can get tired and outdated. An older panel might not be strong enough to handle the modern family’s energy appetite. This is exactly why you would need to upgrade your electrical panel.  Now, let’s look at the specific signals it might be sending you for help. 5 Reasons You Need to Upgrade House Electrical Panel​ Reason 1: Your Breakers Keep Tripping or Won’t Reset Remember that “Whoa, that’s too much!” safety mechanism we just talked about? If it’s happening all the time, it’s a major red flag. If your circuit breaker trips every time you run the microwave and the toaster at the same time, it’s a clear sign that it’s overloaded. And this is one of the clearest answers to the question of when to upgrade electrical panel systems. While an occasional trip is normal, a frequent one means your panel is constantly struggling to keep up with your daily life. This is especially true in winter. Just imagine a freezing night where your space heater, the furnace fan, and the television are all running, and the breaker gives out. Upgrading an electrical panel replaces that overwhelmed system with one that has plenty of capacity. It’s the permanent fix that stops the interruptions and restores peace of mind, making sure you stay warm when you need to. Reason 2: Flickering or Dimming Lights When Appliances Run Do your lights dim for a second when the refrigerator kicks on, or flicker when you turn on the vacuum? This isn’t a minor ghost in the machine; it’s a classic sign of voltage drop. Essentially, your appliances are competing for a limited amount of power, and your lights are losing out. It’s a clear signal that your current system can’t smoothly deliver electricity where it’s needed most. This brings us to a core benefit of upgrading your home electrical panel. Think of it like upgrading from a narrow, congested country road to a modern multi-lane highway. A new panel provides a robust and stable flow of power to every corner of your house, eliminating those annoying flickers. It ensures that your lights stay bright and steady, no matter what else you have running. This directly tackles the question of “Why upgrade your electrical panel?” Reason 3: You’re Adding New Appliances or an EV Charger Now, let’s talk about your home’s future. Are you dreaming of a new electric vehicle, a sleek induction stove, or a powerful hot tub? These modern conveniences are like adding a new superstar athlete to a team, and they need a strong foundation to perform. An older electrical panel, designed for a simpler time, simply wasn’t built to handle the energy demands of an EV charger or other high-power appliances. This is where the value of electric panel upgrades becomes crystal clear. It’s not just about fixing a current problem; it’s about smartly empowering your home for the next decade. Upgrading is like giving your entire electrical system a promotion, ensuring it has the muscle to safely and efficiently power your new investments without breaking a sweat. Reason 4: Your Panel Is Old, Outdated, or Has a Fuse Box Sometimes, the need for an upgrade isn’t about what you’re adding to your home, but about the aging equipment already in it. If your home still has an old-fashioned fuse box with those screw-in fuses, or if your electrical panel is over 25 years old, it’s likely operating on borrowed time. You might be wondering, “Is it finally time to upgrade my electrical panel?” If you notice signs like a buzzing sound, visible rust or burn marks, or if the panel itself feels warm to the touch, the answer is a yes. These are not just signs of wear and tear; they are urgent warnings. Moving to a modern, upgraded electrical panel with advanced safety features is one of the best things you can do to protect your home and family from electrical hazards. Reason 5: You Want a Safer, More Reliable Home This Winter We’ve covered the specific signs, from tripping breakers to an aging panel. But perhaps the most important reason isn’t a single symptom, it’s the overall feeling of security. After understanding the risks, you might simply want the confidence that your home is truly safe and ready for anything winter throws at it. This is the ultimate goal of an upgrade. Choosing to invest in your home’s electrical heart means no more worrying about an outage during a snowstorm or a safety hazard hiding in your walls. It’s about being sure about your family’s comfort and protection. … Read more

Ceiling Light Installation Guide for Home Renovations 2026

Ceiling Light Installation Guide for Home Renovations 2026 When planning a home renovation in 2026, lighting design is more important than ever. Ceiling lights don’t just illuminate a room, but also define its mood, efficiency, and style. Whether you are upgrading to modern LED ceiling lights or planning a full home lighting renovation, smart installation choices can transform your space from ordinary to exceptional. In this guide, we’ll walk you through everything you need to know about ceiling light installation — from choosing the right fixtures to understanding costs and finding trusted electricians near you. Why Ceiling Lights Matter in 2026 Home Renovations Home design trends in 2026 emphasize energy efficiency, minimalism, and smart functionality. Ceiling lights are at the center of this evolution, offering both aesthetic appeal and long-term savings. Top reasons to upgrade your ceiling lighting: Energy Efficiency: LED ceiling lights use up to 80% less power than traditional bulbs. Smart Controls: Motion sensors and app-based dimmers add convenience. Design Versatility: From recessed ceiling lights to pendant fixtures, options fit every style. Resale Value: Modern lighting boosts your home’s appeal for potential buyers. Types of Ceiling Lights for Modern Homes Before diving into installation, it’s important to choose the right fixture for your space. Here are the most popular options in 2026 renovations: Type Best For Style Installation Difficulty Recessed Lights Living rooms, kitchens Minimalist Moderate Flush Mount Ceiling Lights Bedrooms, hallways Sleek & space-saving Easy Pendant Lights Dining areas, kitchens Decorative & focal Moderate Chandeliers Entryways, formal rooms Elegant Complex Track Lighting Workspaces, studios Adjustable Easy Step-by-Step: How to Install Ceiling Lights Safely If you’re handy with tools, you can handle basic installations, but for anything involving rewiring or ceiling modifications, hiring a licensed electrician near you is the safest choice. Here is a general overview of the installation process: Turn Off the Power Always shut off electricity at the breaker box before beginning. Mark Fixture Location Measure spacing and mark where each light will be mounted. Secure Mounting Bracket Attach the bracket to the junction box or ceiling joist. Connect Wires Match black to black (hot), white to white (neutral), and green to ground. Attach Fixture & Test Secure the light and switch the power back on to test the illumination. Pro Tip: Even if you’re confident with DIY, complex ceiling light installation, especially recessed or smart LED systems, should be done by a professional for code compliance and warranty protection. Ceiling Light Installation Costs in 2026 Costs depend on fixture type, ceiling height, and wiring complexity. Here’s a quick breakdown: Installation Type Average Cost Range (USD) Notes Basic Flush Mount $100 – $250 Simple installation Recessed Lighting $150 – $400 per light Includes wiring & hole cutting Pendant Lighting $200 – $450 Depends on design & height Chandelier $300 – $1,000+ Requires expert setup Smart LED Ceiling Lights $250 – $600 App-based and programmable Pro Tip: Ask for an upfront ceiling light installation quote from a local electrician. Transparent pricing helps you compare value and avoid hidden fees. Energy Efficiency & Smart Lighting Trends The 2026 renovation market is leaning toward sustainable lighting solutions. Homeowners now combine LED efficiency with smart home integration, allowing them to control brightness, color temperature, and schedules with mobile apps or voice assistants. Top 2026 lighting upgrades: Smart ceiling lights with Wi-Fi control Motion-sensing hallway lights Dimmable LED recessed lights Solar-assisted outdoor ceiling fixtures Investing in these options can reduce annual energy costs by up to 30% while enhancing daily comfort. When to Search for a Professional Electrician Even though online tutorials make installation look easy, ceiling light wiring involves live circuits and ceiling joists, which can be tricky to navigate. So hiring an experienced electrician ensures: Proper installation that meets safety standards Code compliance for insurance and resale Long-term fixture reliability If you are remodeling multiple rooms, consider scheduling a home lighting installation package. Many electricians offer bundled pricing for whole-home upgrades. Final Thoughts: Light Your Home with Confidence In 2026, home renovation is as much about smart functionality as it is about style. Ceiling light installation plays a central role in creating energy-efficient, elegant, and personalized spaces. Whether you’re upgrading to recessed LEDs, installing chandeliers, or looking for a modern ceiling light installation near me, investing in professional, sustainable solutions ensures your home stays bright and beautiful for years to come. 

Top Electrical Mistakes to Avoid During New Construction in 2026

Top Electrical Mistakes to Avoid During New Construction in 2026 You’ve just moved into your brand-new home. The floors are pristine, the walls are perfectly painted, and the kitchen smells of fresh cabinetry. It’s everything you’ve worked for. But then, a strange thing happens. The kitchen lights flicker when you run the microwave. An outlet in the living room feels warm for no reason. You find yourself constantly resetting a breaker. You think, “But it’s a new build! How could there be electrical panel problems already?” It happens more often than you think. The rush to meet construction deadlines can sometimes mean electrical shortcuts are taken behind those beautiful walls. And that’s probably the reason you are reading this guide today. Think of it as your friendly guide on the construction site. We will walk you through the top electrical mistakes so you can spot them before the drywall goes up, saving you from future headaches and safety hazards. Mistake #1: Overcrowding the Electrical Panel Let’s start with the heart of your home’s electrical system: the breaker panel. When you open that door, what you see inside can tell you a lot about the quality of the entire build. A question we often hear is, “What should I look for inside of a breaker box​?” A common mistake is an overcrowded panel with no room to grow. Think about when in a few years, you might want an electric vehicle charger, a hot tub, or solar panels. Where will they plug in? A desperate, and dangerously common, shortcut is putting two wires into one breaker. This is a major code violation that creates a serious fire risk. Your Simple Checklist: Open the panel and see, are the wires neat and organized, or a tangled mess? Are there several empty slots for future circuits? Are all the breakers clearly labeled? A messy panel isn’t just an eyesore; it makes fuse box troubleshooting a nightmare and is a sign of rushed main panel wiring. But the problems don’t stop at the panel. This kind of rushed work often leads to issues throughout your home, starting with the connections we’ll talk about next. Mistake #2: Making Loose Wiring Connections Now, let’s talk about what’s hiding behind your outlets and light switches. This is where many dangerous electrical panel problems actually begin, often as a direct result of the same rush that causes a messy main panel. Have you ever wondered, “Why do wire nuts melt?” It’s not magic. It’s physics. Loose wiring connections create resistance, and resistance creates intense heat. That heat can melt the plastic wire nut, damage the wire insulation, and can start a fire inside your walls without you ever seeing a spark. So, what’s the solution? It starts with secure wiring connections. And this brings up another great question: “Should you tape wire nuts?” The honest answer is that taping wire nuts isn’t necessary for a safe connection. A properly installed wire nut stays on by itself. In fact, a pile of tape can sometimes be a red flag that the electrician was trying to cover up a poor connection. The real goal is a tight, secure twist that doesn’t need any help. This attention to detail at the connection level is what ensures your devices are safe, which brings us to our next common error. Mistake #3: Back-Stabbing Outlets and Switches The process of wiring wall outlets and wiring switches and receptacles might seem simple, but it’s where many builders take shortcuts to save time and cut costs, creating the very loose wiring we just discussed. A big one is “back-stabbing”—where wires are just pushed into small holes in the back of the device instead of being securely wrapped around the screw terminals. It’s quicker, but those connections loosen over time, leading to flickering lights and dead outlets. How do you know if you have a problem? You’ll quickly learn how to know if an outlet is bad. Tell-tale signs include: Plugs that feel loose and fall out easily. An outlet that feels warm to the touch. A switch that causes lights to flicker. Ensuring proper wiring switches and receptacles is all about using the screw terminals for a solid, long-lasting connection. And just as important as how the wires are connected is where they’re connected, which is our next critical point.  Mistake #4: Using Undersized Junction Boxes Every electrical connection in your home needs to live inside a power box in house, also called a junction box. But sometimes, to save a few dollars or minutes, installers will use boxes that are too small. What happens when you have too many wires crammed into a tiny box? The same thing that happens when people are packed into a small room with no ventilation—things overheat. This trapped heat can damage wires and become a fire hazard. Every electrical connection in your home needs to live inside a power box in house, also called a junction box. But sometimes, to save a few dollars or minutes, installers will use boxes that are too small. What happens when you have too many wires crammed into a tiny box? The same thing that happens when people are packed into a small room with no ventilation—things overheat. This trapped heat can damage wires and become a fire hazard. Here’s what to watch for: Are the electrical boxes bulging where the cover plate won’t sit flat? Can you see a tangled mess of wires when you look into a box? A properly sized box gives your wiring connections room to breathe, which is crucial for safety and makes future electrical repairs much easier. Mistake #5: Installing Too Few Circuits Many builders wire homes to just meet the minimum code requirements to save money. The result? You end up with what feels like a messed up circuit from day one. Imagine your morning routine: you’re running the coffee maker, the toaster, and charging your phone. Suddenly, the kitchen breaker trips. Now you need … Read more